
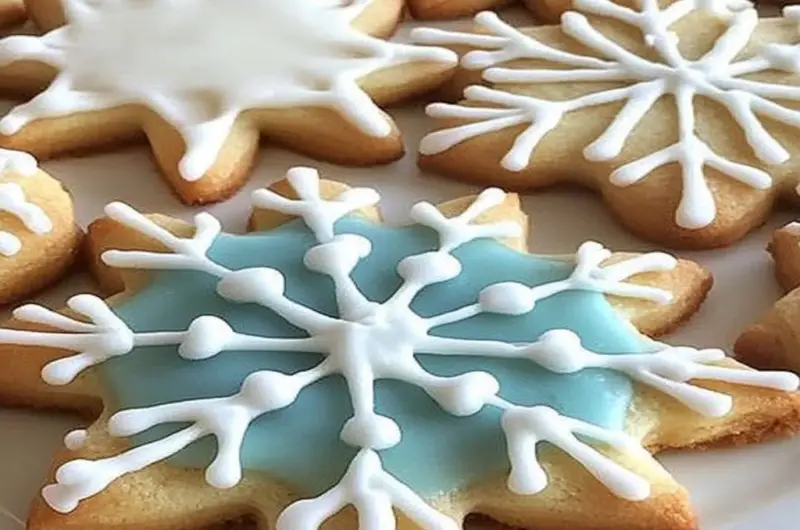
Cookies are like hugs in dessert form, especially when they’re adorned with royal icing and shaped like delicate snowflakes. Imagine biting into a perfectly crisp cookie that melts in your mouth, topped with a glossy layer of sweet, sugary goodness. Royal Icing Snowflake Cookies are not just treats; they’re edible art that brings joy to any winter gathering or holiday celebration. For more inspiration, check out this strawberry cheesecake cookies recipe.
Every time I bake these cookies, I’m transported back to my childhood kitchen, where flour dusted the countertops and laughter filled the air. Whether it’s Christmas, a winter wonderland party, or just a Tuesday that needs brightening, these cookies are the perfect companion. They promise a delightful crunch followed by a soft interior and an explosion of sweetness from the icing—seriously, who could resist?
Why You'll Love This Recipe
- Making Royal Icing Snowflake Cookies is surprisingly easy, even for novice bakers.
- The flavor balance between sweet and buttery creates a melt-in-your-mouth experience.
- Their stunning appearance makes them a showstopper at any gathering or festive occasion.
- You can customize them for any season or event with different colors and shapes.
Ingredients for Royal Icing Snowflake Cookies
Here’s what you’ll need to make this delicious dish:
- All-Purpose Flour: This is the backbone of your cookies. Use unbleached flour for better texture.
- Granulated Sugar: Sweetens the dough and gives it that irresistible crunch.
- Unsalted Butter: Use room temperature butter for easy mixing and rich flavor.
- Eggs: Bind everything together; use large eggs for consistent results.
- Vanilla Extract: Adds a warm, inviting flavor that complements the sweetness.
- Baking Powder: Helps the cookies rise slightly while keeping them crisp on the outside.
For the Royal Icing:
- Powdered Sugar: The main ingredient for icing; sift it for a smooth finish.
- Egg Whites or Meringue Powder: Provides structure to your icing; meringue powder is an excellent egg-free option.
- Food Coloring (optional): Choose gel-based food coloring for vibrant hues without watering down your icing.
The full ingredients list, including measurements, is provided in the recipe card directly below.
How to Make Royal Icing Snowflake Cookies
Follow these simple steps to prepare this delicious dish:
Step 1: Prepare Your Dough
In a large mixing bowl, cream together softened butter and granulated sugar until light and fluffy—think clouds, but tastier! Add in eggs one at a time followed by vanilla extract. Mix until well combined.
Step 2: Combine Dry Ingredients
In another bowl, whisk together all-purpose flour and baking powder thoroughly. Gradually add this mixture to your butter-sugar blend until you form a soft dough. Do not overmix; we want tender cookies!
Step 3: Chill the Dough
Cover the dough with plastic wrap and let it chill in the fridge for at least one hour—this makes rolling easier and prevents spreading during baking.
Step 4: Roll Out & Cut Shapes
Preheat your oven to 350°F (175°C). Roll out your chilled dough on a lightly floured surface to about one-quarter inch thick. Use snowflake-shaped cookie cutters to cut out shapes and place them on lined baking sheets.
Step 5: Bake & Cool
Bake in preheated oven for about eight to ten minutes or until edges are lightly golden. Allow cookies to cool completely on wire racks before decorating.
Step 6: Make Royal Icing
In a clean bowl, combine powdered sugar with egg whites or meringue powder along with water as needed until you achieve a thick yet pipeable consistency. Split into smaller bowls if you’re adding color.
Step 7: Decorate!
Use piping bags or squeeze bottles to decorate your cooled cookies with royal icing. Let them dry completely before stacking or storing—patience is key here!
Transfer to plates and watch everyone oooh and aaah over their beauty before devouring every last bite!
You Must Know
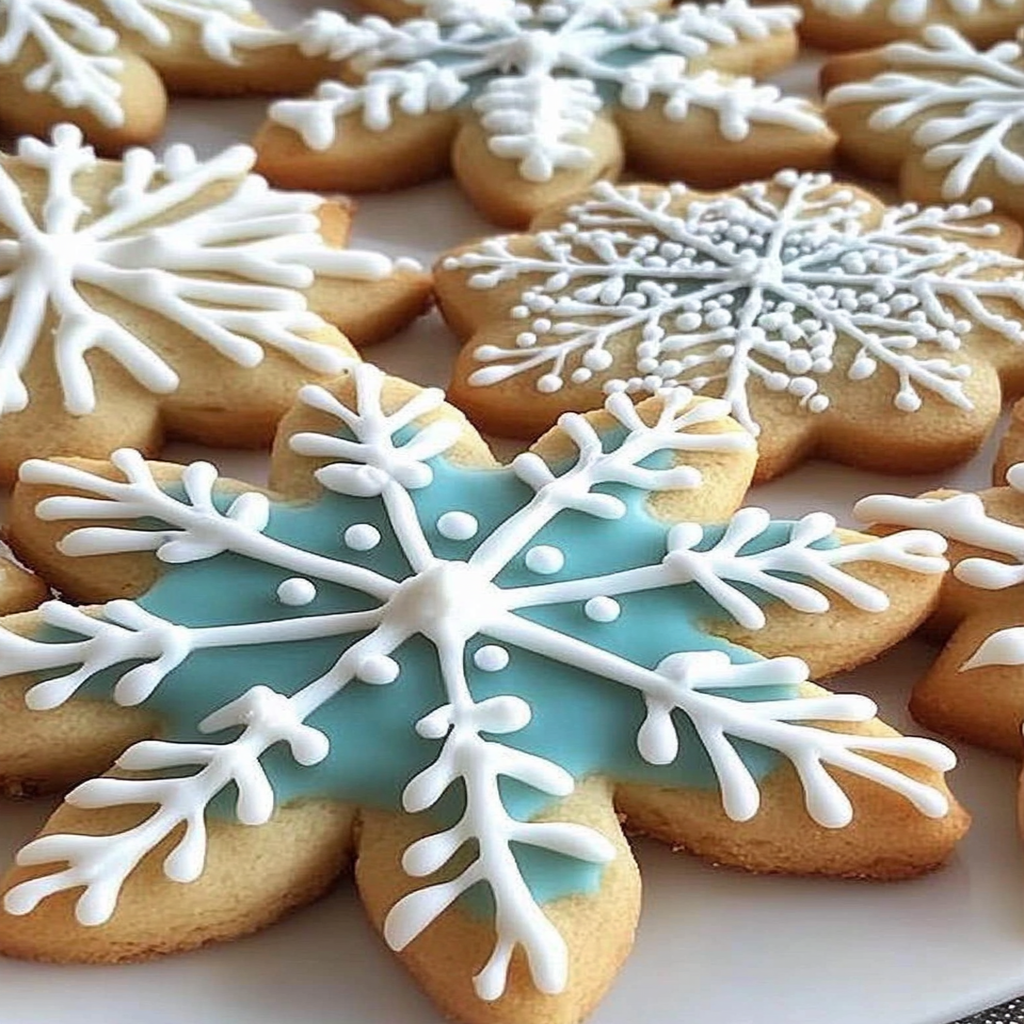
- These delightful Royal Icing Snowflake Cookies aren’t just a treat for the taste buds; they also double as edible art.
- Easy to customize, they add a winter wonderland vibe to any gathering.
- Perfect for decorating with the kids or impressing guests during the holidays.
Perfecting the Cooking Process
To make your Royal Icing Snowflake Cookies perfectly, start by preparing the cookie dough and chilling it. Roll out the dough, cut into shapes, and bake until golden. healthy apple oatmeal breakfast bake Once cooled, whip up that royal icing while you wait to decorate these snowy treats.
Add Your Touch
Feel free to customize your cookies by adding flavor extracts like almond or vanilla. You can also swap out standard sugar for flavored varieties or use different colors of icing to create a vibrant winter scene on your cookies.
Storing & Reheating
Store your decorated Royal Icing Snowflake Cookies in an airtight container at room temperature for up to two weeks. If you need to save them longer, freeze them without icing for up to three months and ice them when ready to serve.
Chef's Helpful Tips
- For perfect Royal Icing Snowflake Cookies, ensure your dough is chilled before rolling it out for better shape retention.
- Use a sifter for powdered sugar when making royal icing to avoid lumps.
- Lastly, let your decorated cookies dry overnight before stacking them.
Making these cookies brings back memories of holiday baking with my grandma. She always said that each cookie should be as unique as a snowflake, and that philosophy still warms my heart today.
FAQs:
What is the best way to make Royal Icing for Snowflake Cookies?
To create the perfect royal icing for snowflake cookies, start with egg whites or meringue powder mixed with powdered sugar and water. Whip until you achieve stiff peaks for outlining and a slightly thinner consistency for flooding. Adjust the water carefully; too much will make it runny, while too little will make it hard to spread. This icing dries quickly, allowing you to stack your cookies without smudging.
How do I decorate my Snowflake Cookies with Royal Icing?
Decorating snowflake cookies with royal icing is a fun process. Begin by outlining the cookie’s shape with stiff royal icing using a piping bag fitted with a fine tip. Once outlined, fill in the center using flooding icing. Use a toothpick to spread the icing evenly. Add details like glitter or edible pearls while the icing is still wet for a festive touch. Let them dry completely before stacking or packaging.
Can I use different colors of Royal Icing on my Snowflake Cookies?
Yes! Using different colors of royal icing on your snowflake cookies can create stunning designs. Divide the royal icing into separate bowls and add gel food coloring to each one until you achieve your desired shades. Pipe intricate patterns or simple dots in various colors to enhance your cookies’ appearance. Just remember, always wait for each layer of colored icing to dry before applying additional designs.
How should I store my Royal Icing Snowflake Cookies?
To maintain the freshness and beauty of your royal icing snowflake cookies, store them in an airtight container at room temperature. If you need to stack them, place parchment paper between layers to prevent sticking. Avoid refrigeration as that can cause condensation and ruin the icing’s texture. Properly stored, these cookies can last up to two weeks without losing their charm.
Conclusion for Royal Icing Snowflake Cookies:
Royal icing snowflake cookies are not only visually appealing but also deliciously fun to create. With simple steps for making and decorating royal icing, anyone can craft these festive treats at home. Remember to let each layer of icing dry fully before stacking your cookies to preserve their beauty. delicious apple fritters recipe Whether for holiday gatherings or as gifts, these cookies are sure to impress everyone who sees them! Enjoy baking and sharing these delightful creations with loved ones! caramel apple cheesecake bars.
Royal Icing Snowflake Cookies
- Total Time: 30 minutes
- Yield: Approximately 24 cookies 1x
Description
Royal Icing Snowflake Cookies are a delightful winter treat that perfectly blend a crispy exterior with a soft, buttery center, all beautifully adorned with vibrant royal icing. These cookies not only satisfy your sweet cravings but also serve as stunning edible decorations for festive gatherings. Ideal for holiday celebrations or any winter occasion, they are easy to make and customizable to fit any theme. Impress your family and friends with these beautiful snowflake-shaped cookies that bring a touch of magic to your dessert table!
Ingredients
- 2 3/4 cups all-purpose flour
- 1 cup granulated sugar
- 1 cup unsalted butter, softened
- 2 large eggs
- 2 tsp vanilla extract
- 1 tsp baking powder
- For Royal Icing: 4 cups powdered sugar
- 3 egg whites or 3 tbsp meringue powder
- food coloring (optional)
Instructions
- In a mixing bowl, cream together the softened butter and granulated sugar until light and fluffy. Add in eggs one at a time, followed by vanilla extract and mix until combined.
- In another bowl, whisk together the all-purpose flour and baking powder. Gradually incorporate the dry mixture into the wet ingredients until a soft dough forms. Avoid overmixing.
- Wrap the dough in plastic wrap and chill in the refrigerator for at least one hour.
- Preheat your oven to 350°F (175°C). Roll out the chilled dough on a floured surface to about 1/4 inch thick. Cut out snowflake shapes using cookie cutters and place them on lined baking sheets.
- Bake for 8-10 minutes or until edges are lightly golden. Let cookies cool completely on wire racks.
- To make royal icing, combine powdered sugar with egg whites or meringue powder and water until you achieve a thick yet pipeable consistency. Add food coloring if desired.
- Decorate cooled cookies with royal icing using piping bags or squeeze bottles. Allow icing to dry completely before stacking.
- Prep Time: 20 minutes
- Cook Time: 10 minutes
- Category: Dessert
- Method: Baking
- Cuisine: American
Nutrition
- Serving Size: 1 cookie (30g)
- Calories: 130
- Sugar: 10g
- Sodium: 50mg
- Fat: 6g
- Saturated Fat: 4g
- Unsaturated Fat: 2g
- Trans Fat: 0g
- Carbohydrates: 18g
- Fiber: <1g
- Protein: 2g
- Cholesterol: 15mg