
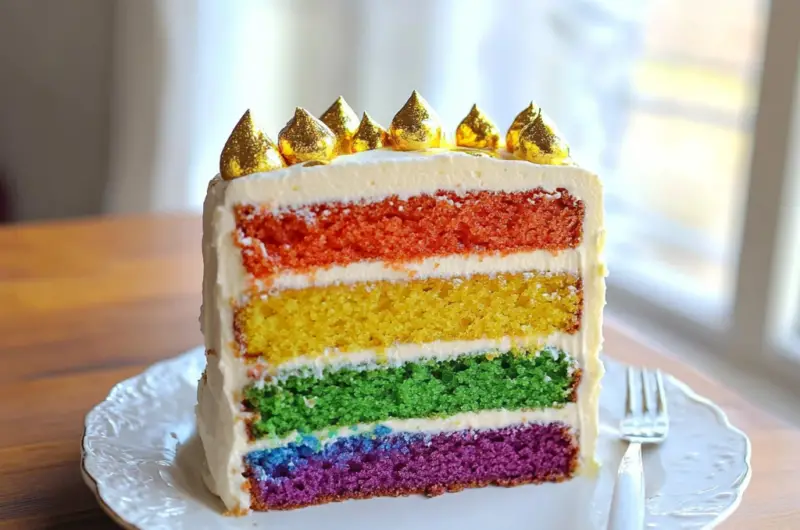
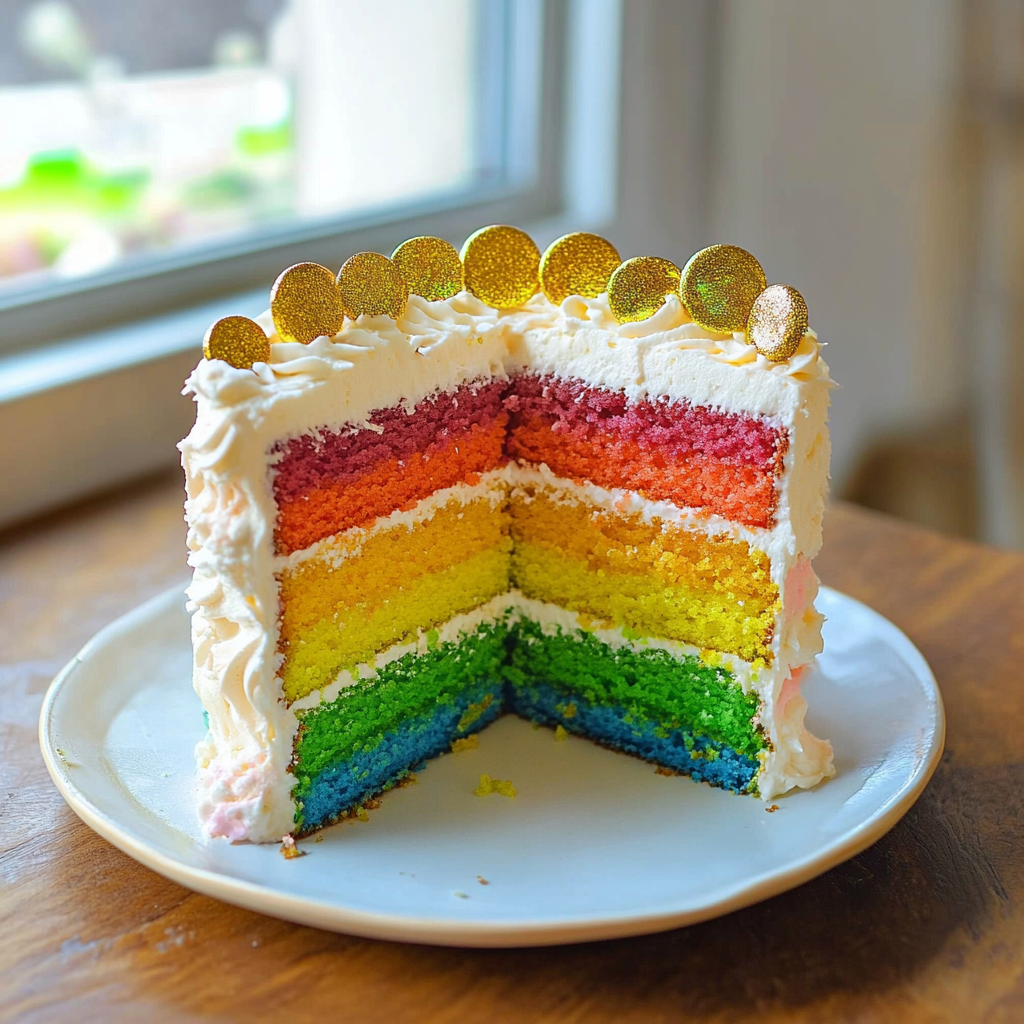
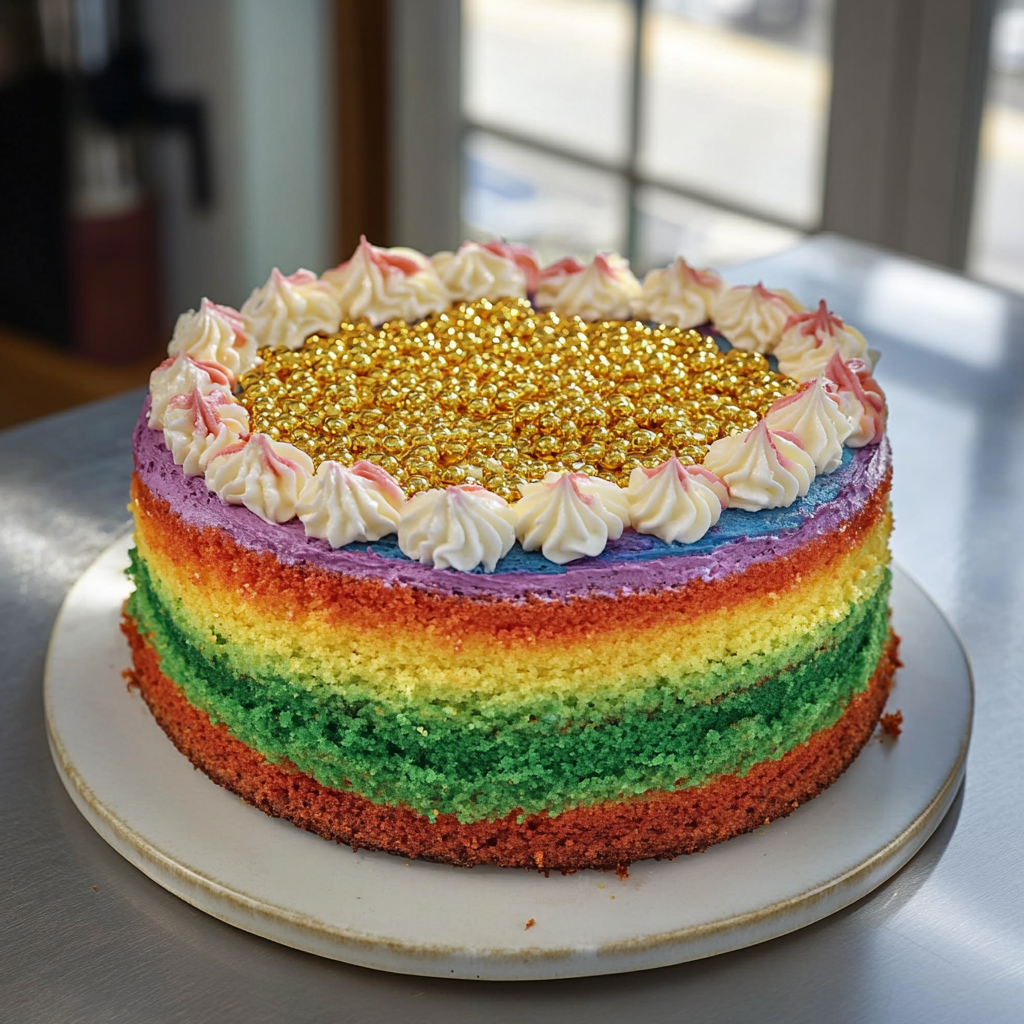
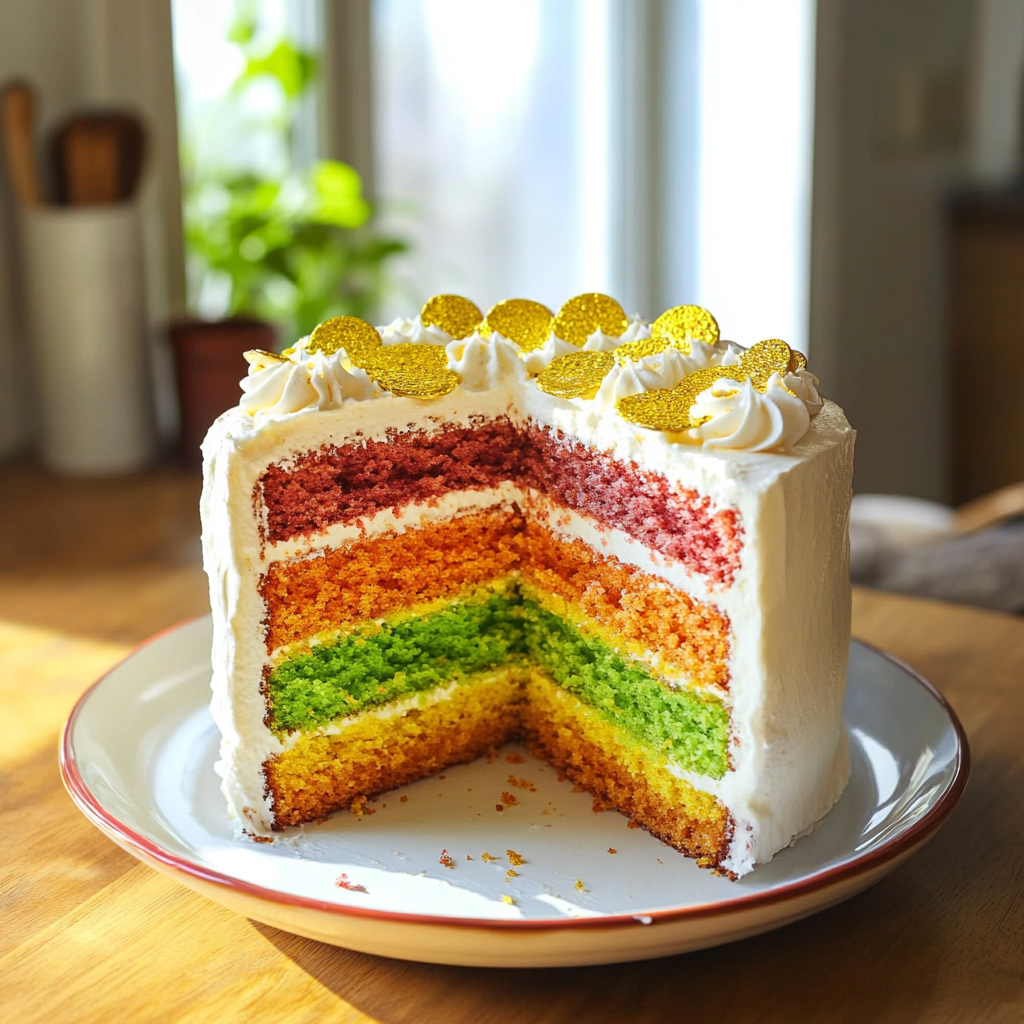
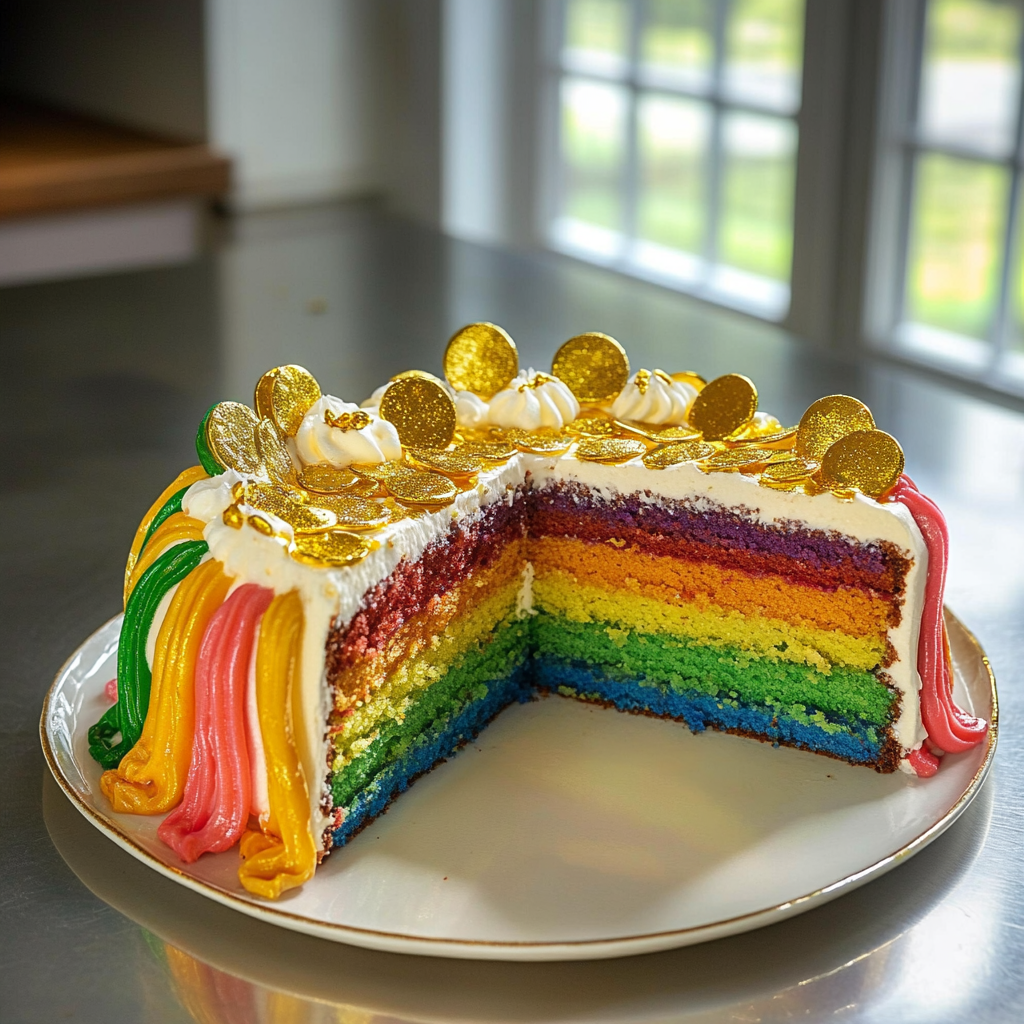
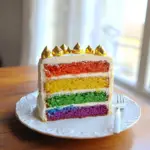
Have you ever dreamt of a cake that brings smiles and joy with each slice? The pot of gold rainbow cake does just that! This enchanting dessert features vibrant layers of color that catch the eye and tantalize the taste buds. Imagine indulging in fluffy vanilla layers infused with rich buttercream frosting that melts in your mouth. It’s not just a treat for the palate but a feast for the eyes.
This delightful cake is perfect for birthdays, holidays, or any celebration where you want to add a splash of color and fun. As you cut into this whimsical creation, the array of colors will spark excitement among guests. Each layer represents a different flavor experience, promising an unforgettable taste journey. With its cheerful appearance and delicious flavors, the pot of gold rainbow cake will become a favorite at your gatherings.
Don’t miss this flavorful favorite!
Why You’ll Love This pot of gold rainbow cake
- Visually Stunning: The vibrant colors create an impressive centerpiece that will wow your guests and elevate any occasion.
- Fun to Make: Involving family or friends in decorating this colorful cake adds a fun element to your baking experience.
- Deliciously Flavored: Each layer can be customized with various flavors, ensuring everyone finds something they love.
Ingredients for pot of gold rainbow cake
Here’s what you’ll need to make this delicious dish:
- Cake Flour: Use high-quality cake flour for a light and airy texture; it makes all the difference in achieving fluffy layers.
- Sugar: Granulated sugar sweetens the batter; make sure it is well incorporated for even sweetness throughout.
- Baking Powder: This leavening agent ensures that your cake rises perfectly and has a light texture.
- Salt: A pinch enhances flavor by balancing sweetness; don’t skip this crucial ingredient!
- Unsalted Butter: Softened butter provides richness; ensure it’s at room temperature for easy mixing.
- Eggs: Large eggs contribute moisture and structure; use room temperature eggs for better mixing results.
- Vanilla Extract: Pure vanilla extract adds aromatic flavor; opt for high-quality varieties for best results.
- Milk: Whole milk gives moisture and richness; if possible, choose fresh milk for optimal flavor.
- Food Coloring: Gel food coloring works best to achieve bright colors without altering batter consistency.
The full ingredients list, including measurements, is provided in the recipe card directly below.
Explore another must-try dish!
How to Make pot of gold rainbow cake
Follow these simple steps to prepare this delicious dish:
Step 1: Prepare Your Baking Pans
Preheat your oven to 350°F (175°C). Grease and flour six round baking pans to ensure easy release after baking.
Step 2: Mix Dry Ingredients
In a medium bowl, whisk together the flour, baking powder, and salt until well combined. Set aside while you mix the wet ingredients.
Step 3: Cream Butter and Sugar
In a large mixing bowl, beat the softened butter and granulated sugar until light and fluffy using an electric mixer on medium speed.
Step 4: Add Eggs and Vanilla
Add eggs one at a time along with vanilla extract to the butter mixture. Beat until fully incorporated before moving on.
Step 5: Combine Dry Ingredients with Milk
Gradually add the dry mixture alternating with milk into the creamed mixture. Mix until just combined; do not overmix.
Step 6: Divide Batter and Color
Divide the batter evenly into six bowls. Use gel food coloring to tint each bowl’s batter with your desired colors—red, orange, yellow, green, blue, purple.
Transfer to prepared pans evenly before baking for about 25 minutes or until a toothpick inserted comes out clean. Allow cooling completely before frosting with buttercream icing.
Tips and Tricks
Here are some helpful tips to ensure the best results for your dish:
- Room Temperature Ingredients: Ensure all refrigerated ingredients are at room temperature before starting; this helps create a uniform batter.
- Layering Technique: For even layers, use kitchen scales to measure batter equally in each pan before baking.
- Chill Between Layers: If your frosting begins to melt while decorating, chill it briefly in the refrigerator before continuing.
- Add Sprinkles!: Top off your frosted layers with colorful sprinkles or edible glitter for extra fun!
With these detailed instructions and tips in hand, you’re ready to create an amazing pot of gold rainbow cake that will dazzle both visuals and taste! Enjoy every moment spent making this delightful dessert.
You might also love this tasty recipe!
How to Serve pot of gold rainbow cake
This pot of gold rainbow cake is versatile and pairs wonderfully with:
- Whipped Cream: The light, airy texture balances the richness of the cake, adding a delightful touch.
- Ice Cream: A scoop of vanilla or rainbow sherbet enhances the colorful theme and adds creaminess.
- Fresh Berries: Juicy berries provide a tart contrast that complements the sweetness of the cake.
Feel free to pair it with your favorite sides for a personalized meal!
Make Ahead and Storage
- Make Ahead: You can prepare the pot of gold rainbow cake layers a day in advance. Allow them to cool completely, then wrap each layer in plastic wrap and store them in the refrigerator. This helps to preserve their freshness and flavor.
- Storing: Store leftover cake in an airtight container at room temperature for up to three days. For longer storage, freeze slices wrapped tightly in plastic wrap and aluminum foil for up to three months.
- Reheating: To reheat frozen slices, thaw them overnight in the refrigerator. You can warm them briefly in a microwave for about 10-15 seconds or enjoy them at room temperature for optimal taste and texture.
Looking for something similar? Check this out!
Suggestions for pot of gold rainbow cake
Use the Right Food Coloring
Choosing the right food coloring is crucial for your pot of gold rainbow cake. Avoid using liquid food coloring, as it can alter the batter’s consistency. Instead, opt for gel food coloring. Gel colors provide vibrant shades without adding extra moisture to the batter. To achieve a striking rainbow effect, use high-quality gel colors and mix each color thoroughly into your batter. This approach ensures that each layer remains bold and distinct. Remember, the more vibrant your colors are, the more visually appealing your cake will be.
Don’t Overmix the Batter
Overmixing the batter can lead to a dense and tough cake, which is not what you want for your pot of gold rainbow cake. Once you’ve combined your dry ingredients with wet ingredients, mix just until you see no streaks of flour. This gentle mixing technique helps maintain a light and airy texture in your cake layers. If you notice lumps after mixing, don’t worry; they will often bake out during cooking. A light hand ensures that each layer remains fluffy and soft.
Layering Tips for Success
The layering process is crucial when creating a stunning pot of gold rainbow cake. Use a scale to ensure even layers, making it easier to stack them without any wobbling. Start with the purple layer on the bottom and continue stacking in order: blue, green, yellow, orange, and red on top. Before adding each layer, allow them to cool completely to prevent melting or sliding. Additionally, use a thin layer of frosting between each color to help hold everything together while adding flavor.
Frosting Techniques That Work
Frosting your pot of gold rainbow cake can be challenging if you’re unfamiliar with techniques. Start with a crumb coat—this is a thin layer of frosting that seals in crumbs and creates a smooth surface for the final coat. After chilling the crumb coat, apply another layer of frosting generously around the entire cake. For decorative effects like swirls or patterns, consider using a spatula or piping bag fitted with different tips. These techniques elevate not only appearance but also taste with added frosting flavor.
FAQs
What flavors work best for pot of gold rainbow cake?
When making a pot of gold rainbow cake, traditional vanilla works well as it allows the colors to shine through without overpowering them. However, feel free to experiment with flavors like almond or lemon for added zest! Incorporating different flavors into each color can create an exciting taste experience; consider matching flavors to their colors (like lemon for yellow). Remember that flavor should complement visual aesthetics while ensuring a delightful eating experience.
Can I make this cake ahead of time?
Yes! You can certainly prepare parts of your pot of gold rainbow cake ahead of time to save yourself stress on serving day. Bake and cool the layers one day prior; wrap them tightly in plastic wrap before refrigerating or freezing them for up to two weeks if necessary. Frosting can also be made ahead; store it in an airtight container in the fridge for up to five days. On serving day, simply assemble and frost your layers while allowing sufficient time for thawing if frozen.
How do I store leftovers from my pot of gold rainbow cake?
To best store leftovers from your pot of gold rainbow cake, cover it tightly with plastic wrap or place it in an airtight container at room temperature if you plan to eat it within two days. If you want longer storage, refrigerate it; this keeps it fresh for up to five days but may slightly alter texture due to refrigeration moisture loss. For extended storage, consider freezing individual slices wrapped tightly in plastic wrap followed by foil; they can last up to three months!
What decorations can enhance my pot of gold rainbow cake?
Enhancing your pot of gold rainbow cake involves creativity! Consider using edible glitter or sprinkles over frosted surfaces for added sparkle reminiscent of magical treasures at rainbows’ ends! You can also add chocolate coins as decoration around the base or atop serves as fun thematic elements while providing tasty surprises inside each slice! Fresh fruits like raspberries or strawberries add color contrast and freshness that beautifully complements every bite.
Craving more delicious ideas? Try this next!
Conclusion for pot of gold rainbow cake
Creating a beautiful pot of gold rainbow cake requires attention to detail and some key techniques that ensure success. From selecting high-quality food coloring and avoiding overmixing the batter to mastering layering and frosting techniques—each aspect plays an important role in achieving that vibrant look and delightful taste you desire. Preparing components ahead saves time on serving day while proper storage ensures leftovers remain enjoyable later on! Don’t forget creative decorations elevate not just visuals but also overall flavors—making your celebration truly unforgettable!
Pot of Gold Rainbow Cake
- Total Time: 55 minutes
- Yield: Serves approximately 12 slices 1x
Description
Pot of Gold Rainbow Cake is a vibrant and whimsical dessert that will brighten any celebration. Featuring six colorful layers of fluffy vanilla cake, each infused with rich buttercream frosting, this delightful treat is not only a feast for the eyes but also a delicious journey for the taste buds. Perfect for birthdays, holidays, or just because, every slice reveals a rainbow of flavors that will leave your guests smiling with joy.
Ingredients
- 2 3/4 cups cake flour
- 2 cups granulated sugar
- 1 tablespoon baking powder
- 1 teaspoon salt
- 1 cup unsalted butter, softened
- 5 large eggs, at room temperature
- 1 tablespoon vanilla extract
- 1 cup whole milk, at room temperature
- Gel food coloring (red, orange, yellow, green, blue, purple)
Instructions
- Preheat oven to 350°F (175°C) and grease six round baking pans.
- In a bowl, whisk together flour, baking powder, and salt. Set aside.
- In another bowl, cream butter and sugar until light and fluffy.
- Add eggs one at a time along with vanilla extract and mix well.
- Gradually alternate adding dry ingredients and milk to the creamed mixture until just combined.
- Divide batter into six bowls; tint each with gel food coloring.
- Pour colored batters into prepared pans and bake for about 25 minutes or until a toothpick comes out clean. Allow cooling completely before frosting.
Notes
Use room temperature ingredients for better mixing.
Customize flavors by adding extracts or zest to each layer.
Decorate with sprinkles or edible glitter for extra flair.
- Prep Time: 30 minutes
- Cook Time: 25 minutes
- Category: Dessert
- Method: Baking
- Cuisine: American
Nutrition
- Serving Size: 1 slice (100g)
- Calories: 364
- Sugar: 32g
- Sodium: 200mg
- Fat: 16g
- Saturated Fat: 10g
- Unsaturated Fat: 5g
- Trans Fat: 0g
- Carbohydrates: 52g
- Fiber: 0g
- Protein: 4g
- Cholesterol: 70mg