There’s something undeniably magical about the aroma of toasted bread mingling with melted cheese, isn’t there? Picture this: You’re rushing through your kitchen, trying to whip up something that will not only satiate hungry bellies but also ignite joy in the heart. perfect breakfast pairing Enter the back-to-school grilled cheese roll-ups—crispy, cheesy, and oh-so-delicious! They are perfect for those chaotic mornings when you need a breakfast that’s both easy and fun. nutritious breakfast bake.
Imagine biting into these roll-ups and experiencing a satisfying crunch followed by gooey cheese that offers a comforting embrace. These delightful bites are perfect for lunch boxes or post-school snacks. Plus, they’re so versatile you could even serve them at a party and watch your friends devour them like they were made of magic. Get ready to create some unforgettable moments with these cheesy treats that promise smiles all around!
Why You'll Love This Recipe
- These back-to-school grilled cheese roll-ups are quick and easy to prepare, making them ideal for busy mornings.
- The flavor combinations can be endless, allowing you to get creative with your fillings.
- Their visual appeal with golden-brown crusts is sure to please both kids and adults alike.
- Perfect for lunch boxes or snack time after school, they are versatile enough to suit any occasion.
Ingredients for Back-to-school grilled cheese roll-ups
For more inspiration, check out this Philly cheesesteak pasta recipe.
Here’s what you’ll need to make this delicious dish:
- Bread: Choose soft sandwich bread; white or whole wheat works well. The softer bread allows for easier rolling.
- Cheese: Use your favorite melting cheese such as cheddar, mozzarella, or a blend for that stretchy goodness.
- Butter: Opt for unsalted butter; it helps achieve that golden-brown crispiness on the outside.
- Optional Fillings: Consider adding ham, turkey, or veggies like spinach for extra flavor and nutrition.
The full ingredients list, including measurements, is provided in the recipe card directly below.
How to Make Back-to-school grilled cheese roll-ups
Follow these simple steps to prepare this delicious dish:
Step 1: Prepare Your Ingredients
Gather your bread and cheese (plus any optional fillings) before you get started. Preheat your skillet over medium heat while you’re at it.
Step 2: Flatten the Bread
Take each slice of bread and gently flatten it using a rolling pin or even a heavy pot—just don’t go too crazy; we want it intact!
Step 3: Add Cheese
Place a generous amount of cheese on one end of each flattened slice. If you’re feeling fancy, throw in some ham or veggie toppings for added flair.
Step 4: Roll It Up
Starting from the end with the cheese filling, carefully roll the bread tightly into a log shape. Secure it with toothpicks if needed—just remember to remove them later!
Step 5: Butter & Toast
Spread butter on all sides of each roll-up. Place them seam-side down in your preheated skillet. Cook until golden brown (about 2-3 minutes per side).
Step 6: Serve & Enjoy
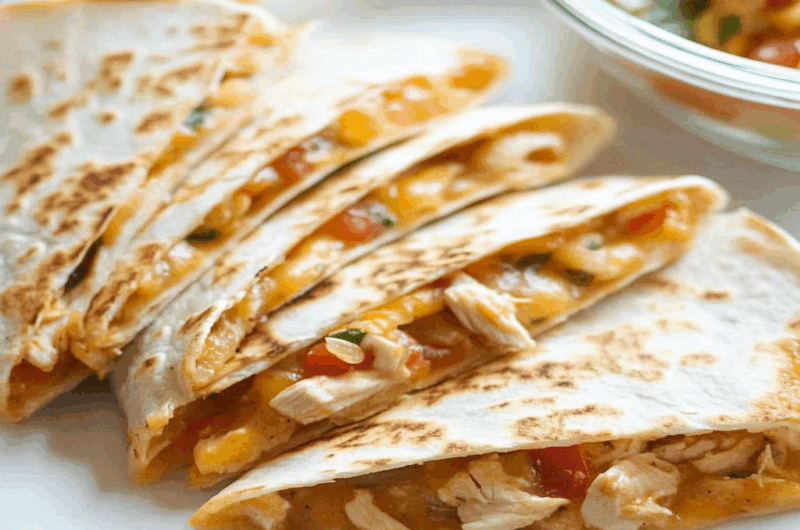
Once perfectly toasted, transfer your cheesy masterpieces onto plates. Cut them in half to reveal that gorgeous melty center—then dig in!
These back-to-school grilled cheese roll-ups aren’t just meals; they’re memories waiting to happen! Whether enjoyed at home after school or packed up for lunchboxes, they bring comfort and joy in every bite. So grab some ingredients and get rolling; deliciousness awaits!
You Must Know
- These back-to-school grilled cheese roll-ups are not just tasty; they simplify lunchtime chaos.
- Customize with your favorite fillings, and watch your kids devour them.
- Perfect for quick meals and delightful for the whole family.
- Easy to make, fun to eat, and a definite crowd-pleaser!
Perfecting the Cooking Process
Start by preheating your pan while you prepare your ingredients. Assemble your roll-ups, then cook them in batches to achieve that perfect golden brown exterior without overcrowding the pan.
Add Your Touch
Feel free to swap out cheeses or add extras like turkey slices, spinach, or even a sprinkle of herbs. Experimenting with different dips can also elevate the experience!
Storing & Reheating
Store leftover roll-ups in an airtight container in the fridge for up to three days. To reheat, simply pop them in a toaster oven or skillet until warm and crispy.
Chef's Helpful Tips
- For perfectly crispy roll-ups, make sure your pan is hot enough before adding them.
- Use a good quality cheese for maximum melting goodness.
- Don’t rush the cooking process; patience leads to perfection!
Sometimes I think my kids have grilled cheese radar; they can sniff it out from miles away! The joy on their faces when I serve these roll-ups feels like instant gratification.
FAQs:
What are back-to-school grilled cheese roll-ups?
Back-to-school grilled cheese roll-ups are a fun twist on the classic grilled cheese sandwich. Instead of traditional slices of bread, this recipe uses tortillas or flatbreads that are filled with gooey cheese and then rolled up. They’re easy to make, perfect for kids’ lunchboxes, and can be customized with various ingredients like meats or veggies. delicious appetizer option These roll-ups not only save time in the kitchen but also provide a delicious and portable meal option that kids will love.
How do I make back-to-school grilled cheese roll-ups?
To make back-to-school grilled cheese roll-ups, start by laying out a tortilla or flatbread. Spread a layer of cheese over it, adding extras like ham or spinach if desired. Roll it tightly and then cook in a skillet until golden brown and crispy. Slice into bite-sized pieces for easier handling. This method allows for quick preparation while delivering a satisfying meal that’s ideal for busy school days.
Can I prepare back-to-school grilled cheese roll-ups ahead of time?
Yes, you can prepare back-to-school grilled cheese roll-ups ahead of time. After rolling and cooking them, let them cool before storing in an airtight container in the refrigerator. They can stay fresh for up to three days. When ready to eat, simply reheat them in a skillet or microwave until warm. This makes them a great option for meal prepping school lunches that are both nutritious and appealing.
What variations can I try with back-to-school grilled cheese roll-ups?
There are many delicious variations you can try with back-to-school grilled cheese roll-ups. Experiment with different cheeses like mozzarella or cheddar, or add ingredients such as turkey slices, avocado, or even bell peppers for added flavor and nutrition. You can also serve them with dips like marinara sauce or guacamole to enhance the taste experience. The flexibility of this recipe allows you to cater to your children’s preferences while keeping meals exciting.
Conclusion for Back-to-school grilled cheese roll-ups:
In conclusion, back-to-school grilled cheese roll-ups offer an innovative way to enjoy a beloved classic while providing versatility and ease of preparation. These tasty snacks are not only kid-friendly but also perfect for busy parents looking for quick meal solutions. light and refreshing side dish With endless customization options, they can suit any palate and dietary preference while keeping lunchtime enjoyable. Try making these delightful roll-ups today to add some fun to your child’s lunch routine!
Back-to-school Grilled Cheese Roll-ups
- Total Time: 20 minutes
- Yield: 4 servings 1x
Description
Back-to-school grilled cheese roll-ups are the ultimate solution for busy mornings and after-school snacks. These crispy, cheesy delights feature soft bread rolled around gooey cheese, delivering a satisfying crunch in every bite. Quick and easy to prepare, they are customizable with your favorite fillings, making them perfect for lunch boxes or family gatherings. With their golden-brown crusts and melty centers, these roll-ups promise to delight both kids and adults alike. Get ready to create unforgettable moments around the table!
Ingredients
- 4 slices soft sandwich bread (white or whole wheat)
- 1 cup shredded cheese (cheddar, mozzarella, or blend)
- 2 tablespoons unsalted butter
- Optional: 1/2 cup diced ham or turkey, 1/2 cup spinach
Instructions
- Preheat your skillet over medium heat.
- Flatten each slice of bread using a rolling pin.
- Place a generous amount of cheese at one end of each slice; add optional fillings if desired.
- Roll the bread tightly from the cheese end; secure with toothpicks if necessary.
- Butter all sides of each roll-up and place seam-side down in the skillet.
- Cook until golden brown, about 2-3 minutes per side.
- Serve warm; cut in half to enjoy the melted center.
- Prep Time: 10 minutes
- Cook Time: 10 minutes
- Category: Snack
- Method: Frying
- Cuisine: American
Nutrition
- Serving Size: 1 roll-up (60g)
- Calories: 210
- Sugar: 1g
- Sodium: 350mg
- Fat: 12g
- Saturated Fat: 7g
- Unsaturated Fat: 4g
- Trans Fat: 0g
- Carbohydrates: 20g
- Fiber: 1g
- Protein: 8g
- Cholesterol: 30mg