
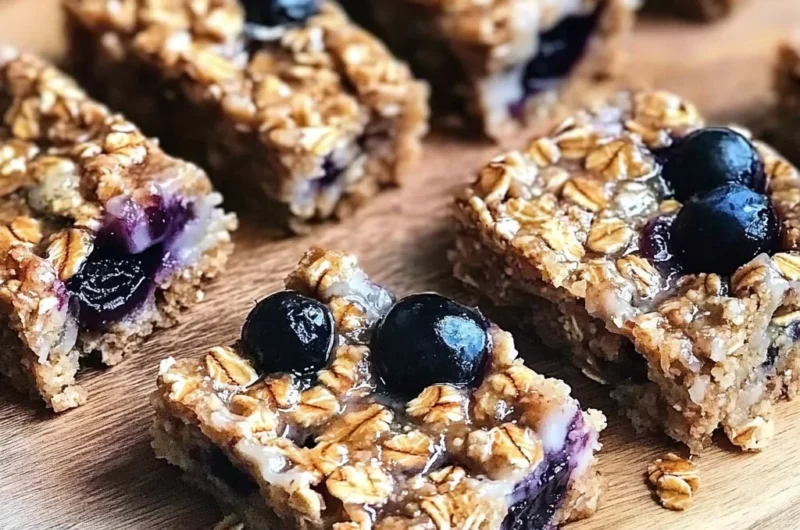
Imagine waking up to the tantalizing aroma of freshly baked Yogurt Oat Breakfast Bars wafting through your kitchen, a delightful blend of creamy yogurt and wholesome oats that promises to kickstart your day with a smile. The soft, chewy texture combined with a hint of sweetness creates a symphony for your taste buds, making every bite an irresistible morning treat perfect for busy weekdays or leisurely weekend brunches.
Every time I indulge in these bars, I’m transported back to lazy Sunday mornings spent in cozy pajamas, where the only thing on my agenda was savoring delicious food and the company of loved ones. These Yogurt Oat Breakfast Bars are not just a quick grab-and-go option; they embody warmth and comfort, making them ideal for family gatherings or as a nutritious snack during a hectic day. Get ready to experience an explosion of flavor that will have you reaching for seconds!
Why are Yogurt Oat Breakfast Bars a must-try?
Packed with nutrients, these bars are a delicious way to kickstart your day!
Easy to make, perfect for busy mornings or on-the-go snacking.
Versatile, you can customize with your favorite fruits and nuts.
Flavorful and satisfying, they’ll please both kids and adults alike!
Time-saving, whip up a batch in just 30 minutes!
Yogurt Oat Breakfast Bars Ingredients
For the Base
- Rolled oats – a hearty foundation that adds texture and fiber.
- Greek yogurt – provides creaminess and protein, making these bars satisfying.
- Honey – natural sweetness that binds the ingredients together beautifully.
- Banana – mashed for moisture and a touch of fruity flavor.
For the Flavoring
- Cinnamon – adds warmth and depth, enhancing the taste profile of the bars.
- Vanilla extract – a splash brings out the sweetness and elevates the overall flavor.
Optional Add-ins
- Chopped nuts – almonds or walnuts add crunch and healthy fats to your breakfast bars.
- Dried fruits – raisins or cranberries can sweeten things up while providing chewiness.
These Yogurt Oat Breakfast Bars are perfect for busy mornings or a nutritious snack after school!
How to Make Yogurt Oat Breakfast Bars
1. Preheat the oven: Start by preheating your oven to 350°F (175°C). This step is crucial for achieving that perfectly baked texture in your Yogurt Oat Breakfast Bars.
2. Mix the dry ingredients: In a large bowl, combine rolled oats, flour, and a pinch of salt. Stir them gently until well mixed, creating a welcoming aroma that fills your kitchen.
3. Combine wet ingredients: In another bowl, whisk together yogurt, honey, and an egg until smooth. The mixture should be creamy and slightly thick, making it irresistibly delicious.
4. Blend together: Pour the wet ingredients into the dry mixture and fold gently until just combined. Be careful not to overmix; you want those delightful oat chunks to shine through!
5. Add mix-ins: If you’d like, fold in some chopped nuts or dried fruits for extra flavor and texture. This step adds a personal touch to your Yogurt Oat Breakfast Bars.
6. Prepare the baking dish: Grease a baking pan or line it with parchment paper for easy removal later. This will ensure your bars come out beautifully without sticking.
7. Bake the mixture: Spread the batter evenly in the prepared baking dish and bake for about 20-25 minutes or until golden brown on top. The edges should be firm while the center remains slightly soft.
8. Cool down: Once baked, allow the bars to cool in the pan for at least 10 minutes before transferring them to a wire rack to cool completely. Patience is key here!
9. Slice and serve: Once cooled, slice the bars into squares or rectangles as per your preference. They are perfect for breakfast or as an on-the-go snack!
Optional: Drizzle with melted chocolate for a sweet finishing touch.
Exact quantities are listed in the recipe card below.
Expert Tips
- Choose the Right Yogurt: Use Greek yogurt for creaminess and protein, but feel free to experiment with dairy-free options for a lighter texture.
- Oats Matter: Opt for old-fashioned oats instead of quick oats; they provide better structure and chewiness in your yogurt oat breakfast bars.
- Don’t Overmix: Mix just until combined. Overmixing can lead to dense bars instead of the light, fluffy texture we want.
- Add Flavor Wisely: Enhance with spices like cinnamon or nutmeg, but be cautious not to overpower the natural flavors of your yogurt oat breakfast bars.
- Perfect Baking Time: Keep an eye on baking time; overbaking can dry them out. Check for a golden edge while ensuring they remain soft in the center.
How to Store and Freeze Yogurt Oat Breakfast Bars

Room Temperature: Store your yogurt oat breakfast bars in an airtight container for up to 3 days. This keeps them fresh and delicious, perfect for a quick grab-and-go snack.
Fridge: For extended freshness, refrigerate the bars in a sealed container for up to 1 week. This helps maintain their moist texture while providing a refreshing chill.
Freezer: Freeze individual bars wrapped tightly in plastic wrap or foil for up to 3 months. Simply thaw overnight in the fridge before enjoying, making them a convenient option for busy mornings.
Reheating: To enjoy warm, microwave each bar for about 15-20 seconds. This enhances the flavors of your yogurt oat breakfast bars, giving you that freshly baked taste!
Yogurt Oat Breakfast Bars Variations
Feel free to get creative and tailor these bars to your taste buds and dietary needs!
- Dairy-Free: Substitute yogurt with coconut or almond yogurt for a delicious plant-based option. Your breakfast bars will still be creamy and satisfying.
- Nut-Free: Replace any nuts with seeds like sunflower or pumpkin seeds for added crunch without the allergens. These seeds pack a nutritious punch, making each bite delightful.
- Fruit-Filled: Mix in dried fruits like cranberries or apricots for a sweet surprise. Their chewy texture adds a lovely contrast to the chewiness of oats.
- Chocolate Lover’s: Add dark chocolate chips or cocoa powder to the mixture for an indulgent twist. Chocolate makes everything better, right?
- Spicy Kick: Incorporate a dash of cinnamon or nutmeg for a warm, inviting flavor. This aromatic addition transforms your bars into a cozy morning treat.
- Protein Boost: Stir in protein powder or Greek yogurt for an extra nutritional boost. It’s perfect if you want to stay fuller longer!
- Low-Sugar Option: Use mashed bananas or unsweetened applesauce as natural sweeteners instead of sugar. These alternatives keep your bars moist and flavorful without the added sugar rush.
- Savory Delight: Try adding shredded cheese or herbs like rosemary for a unique savory version. Think outside the box—these savory bars could be a surprising hit!
Make Ahead Options
If you’re looking to simplify your mornings, these Yogurt Oat Breakfast Bars are perfect for meal prep! You can prepare the dry ingredients—like oats, flour, and spices—up to 3 days in advance. Simply mix them in a bowl and store in an airtight container. Additionally, you can make the yogurt mixture the night before; just combine your yogurt with honey and any add-ins like nuts or dried fruit, and refrigerate overnight. When you’re ready to bake, simply combine the wet and dry components and pour them into your pan. To maintain their deliciousness, store the finished bars in an airtight container at room temperature for up to 5 days or in the fridge for a week. Enjoy a wholesome breakfast that’s ready when you are!
Yogurt Oat Breakfast Bars Recipe FAQs
What type of yogurt is best for these breakfast bars?
For the creamiest texture and rich flavor, I recommend using Greek yogurt. It adds a lovely tang and helps bind the ingredients together. If you’re looking for a lighter option, regular plain yogurt works just fine too, but the bars may be slightly less dense.
How should I store my Yogurt Oat Breakfast Bars?
Once cooled, wrap your breakfast bars in plastic wrap or store them in an airtight container. They can be kept at room temperature for up to three days, but for longer freshness, refrigerate them for up to one week. Just make sure they are placed in a cool spot to maintain their chewy goodness!
Can I freeze my Yogurt Oat Breakfast Bars?
Absolutely! These bars freeze beautifully. Just cut them into individual portions, wrap each one tightly in plastic wrap, and then place them in a freezer-safe bag. They can last up to three months in the freezer. When you’re ready to enjoy, simply thaw them overnight in the fridge or pop them in the microwave for about 15-20 seconds.
What should I do if my bars are too crumbly?
If your bars turn out crumbly, it likely means there wasn’t enough moisture or binding agent. In your next batch, consider adding an extra tablespoon of yogurt or a little honey to help hold everything together. You can also try pressing the mixture down more firmly into your pan before baking!
Are there any dietary alternatives I can make for these bars?
Certainly! For a gluten-free version, simply substitute rolled oats with certified gluten-free oats. If you’re looking to reduce sugar intake, you can use unsweetened applesauce or mashed bananas instead of honey or maple syrup. Additionally, dairy-free yogurt options are available if you want to make this recipe vegan!
Can I add different mix-ins to my Yogurt Oat Breakfast Bars?
Yes! This recipe is quite versatile. Feel free to incorporate things like nuts, seeds, dried fruits, or even chocolate chips based on your family’s preferences. Just remember that if you add larger items like nuts or fruits, you may need to adjust the wet ingredients slightly so that the consistency remains perfect!

Yogurt Oat Breakfast Bars
Ingredients
Method
- Preheat the oven to 350°F (175°C).
- In a large bowl, combine rolled oats, flour, and a pinch of salt. Stir gently until well mixed.
- In another bowl, whisk together yogurt, honey, and an egg until smooth.
- Pour the wet ingredients into the dry mixture and fold gently until just combined.
- Fold in chopped nuts or dried fruits if desired.
- Grease a baking pan or line it with parchment paper.
- Spread the batter evenly in the prepared baking dish and bake for 20-25 minutes or until golden brown.
- Allow the bars to cool in the pan for at least 10 minutes before transferring to a wire rack.
- Slice the bars into squares or rectangles and serve.